Understanding Surface Finish in Manufacturing
Surfaces in manufacturing applications must remain within desired roughness limits to ensure the optimum quality of parts. Surface finishing has a crucial impact on the durability and performance of the product. Therefore, it is essential to learn about the surface roughness chart and its importance.
Rough surfaces often wear and tear more rapidly. The friction levels are higher than that in smooth surfaces, and irregularities in a surface’s smoothness tend to create nucleation sites. Breaks and corrosion occurring in these sites could then cause the material to wear easily.
Conversely, there is a degree of roughness that can give room for desired adhesion. Therefore, you must never leave the surface finish up for interpretation. Suppose you think surface finish does matter for your product, this guide is for you.
What is Surface Finish?
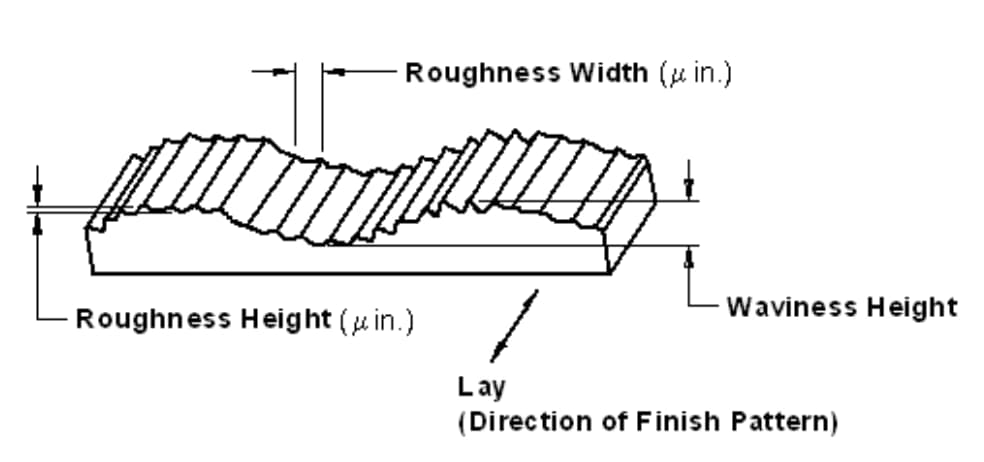
Before we go into the surface finish chart, let’s understand what surface finish entails. Surface finish refers to the process of altering a metal’s surface that involves removing, adding, or reshaping. It is a measure of the complete texture of a product’s surface that is defined by three characteristics of surface roughness, waviness, and lay.

The surface roughness is the measure of the total spaced irregularities on the surface. Whenever machinists talk about “surface finish,” they often refer to surface roughness.
Waviness refers to the warped surface whose spacing is greater than that of surface roughness length. And lay refers to the direction the predominant surface pattern takes. Machinists often determine the lay by the methods used for the surface.

Why is Surface Finish Important in Engineering Processes?
Surface roughness plays a very crucial role to determine how a product reacts with its environment. The finish of a product indicates the performance of its components. Also, the level of roughness may affect the effectiveness of a product.
This depends on the application of such a product. Engineers and manufacturers must maintain surface finish at all times. It helps to produce consistent processes and reliable products.
Surface measurements also help maintain control of manufacturing. It is very useful whenever there’s a need for surface engineering.
Different surface finishes have a variety of effects. The easiest way to get the desired surface finish is to compare it with the surface finish standards. Surface finish can help in the following ways and more:
Incredibly important for corrosion and chemical resistant effects.
It offers a specific visual appeal to the product.
Helps with the adhesion of coatings and paints.
Eliminates surface defects.
Improves conductivity and adds surface electrical conductions.
Increases product’s strength against wear while minimizing friction effects.
To learn more about surface finishing, read our guide to plastic injection molding surface finish options and read our article about getting the best CNC machining surface finish for your products.
How to Measure Surface Roughness?
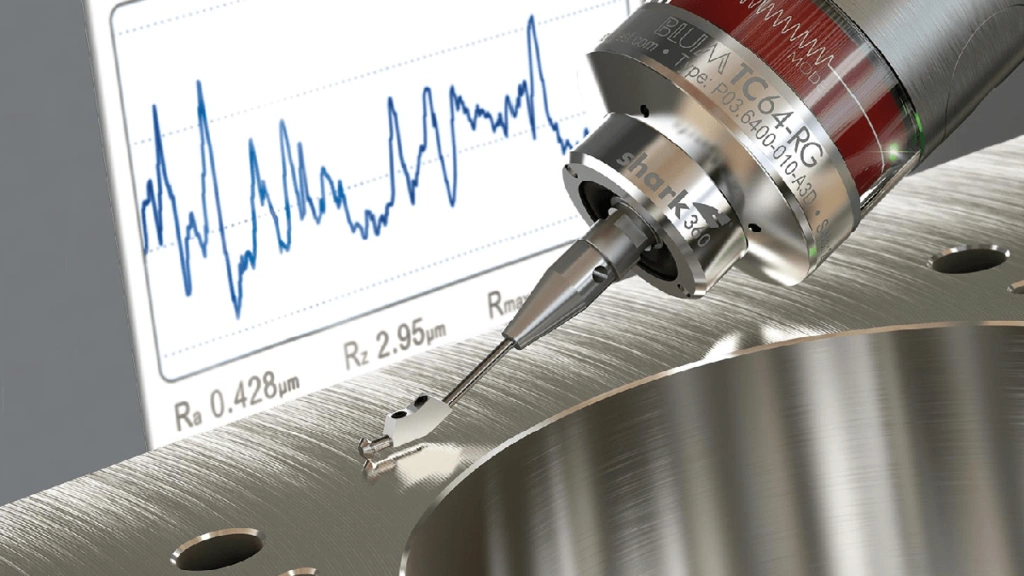
Surface roughness is a calculation of the relative smoothness of a surface’s profile. The numeric parameter – Ra. The Ra surface finish chart shows the arithmetic average of surface heights measured across a surface.
As already mentioned, there are three basic components of a surface, roughness, waviness, and lay. Therefore, different factors are affecting the characteristics of surface geometry.

Likewise, there are several measuring systems for surface roughness. The systems include:
Direct measurement methods
Non-contact methods
Comparison methods
In-process methods
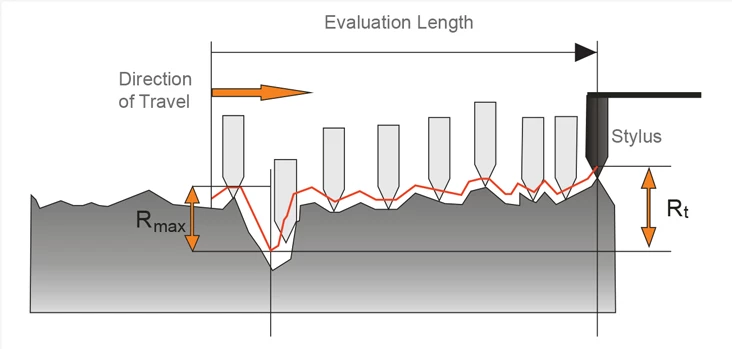
The direct measurement methods measure surface roughness using a stylus. That involves drawing the stylus perpendicular to the surface. The machinist then uses a registered profile to determine roughness parameters.
Non-contact methods involve the use of light or sound instead. Optical instruments like white light and confocal replace the stylus. These instruments use different principles for measurement. The physical probes can then be switched with optical sensors or microscopes.
First, the instrument used will send an ultrasonic pulse to the surface. Then, there’ll be altering and reflection of the sound waves back to the device. You can then assess the reflected waves to determine roughness parameters.
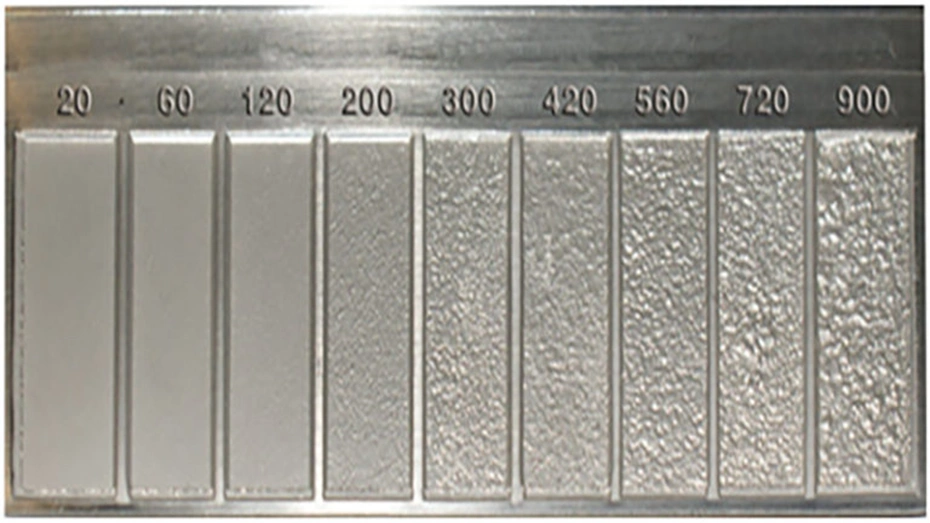
Comparison techniques employ surface roughness samples. These samples are generated by the equipment or process. Then, the manufacturer uses tactile and visual senses to compare the results against the surface of known roughness parameters.
An example of in-process technique is inductance. This method helps to evaluate surface roughness using magnetic materials. The inductance pickup uses electromagnetic energy to gauge the distance to the surface. Then, the parametric value determined can help find out comparative roughness parameters.
Various Methods of Measuring Surface Roughness
There are different methods and equipment involved in measuring surface roughness. The methods can fall into three categories. They are:
Profiling Techniques. This involves the measurement of the surface using a high-resolution probe. In this process, you need to think more of a phonograph needle in line with sensitivity. A typical CNC probe may not be as effective.
Area Techniques. These techniques measure a finite area of the surface. The measurement offers a statistical average of peaks and troughs in the surface. Some examples of these techniques include ultrasonic scattering, optical scattering, capacitance probes, and more. It is easier to automate and execute with area techniques.
Microscopy Techniques. These qualitative techniques rely on measuring contrasts. The results provide relevant information about peaks and valleys on surfaces.
Surface Roughness Chart Symbols and Abbreviations
When you search for machining surface finish symbols on your favorite browser, you would notice a range of abbreviations. These include Ra, Rsk, Rq, Rku, Rz, and more. They are units used in measuring surface finish.
Ra – Average Surface Roughness
While most people refer to Ra as Center Line Average or Arithmetic Average, it is the average roughness between a roughness profile and the mean line. This is the most commonly used parameter for surface finish. The Ra surface finish chart is also one of the most used for absolute values.
Rmax – Vertical Distance from Peak to Valley
This roughness parameter is best used for anomalies such as burrs and scratches. It may not be obvious with the Ra surface finish chart though. However, Rmax is a lot more sensitive to those anomalies.
Rz – Average Maximum Height of the Profile
Unlike Ra, Rz measures the average values of the five largest differences between peaks and valleys. The measurement is done using five sampling lengths, and it helps to eliminate error since Ra is quite insensitive to some extremes.

Surface Roughness Chart
The machining surface finish chart offers important guidelines for measuring standard surface finish parameters. Manufacturers always use it as a reference material to ensure quality in the manufacturing process.

There are different processes in examining the machining surface finish chart. As a result, it becomes challenging to pick the best process based on the performance of the product. However, the most robust is the use of the surface finish conversion chart.
Surface Finish Conversion Chart
In this section, there’s a table for the surface finish conversion chart. This table compares the different surface roughness scales for manufacturing processes. Meanwhile, let’s go through some of the abbreviations you’ll find there.
Ra = Roughness Average
RMS = Root Mean Square
CLA = Center Line Average
Rt = Roughness Total
N = New ISO (Grade) Scale Numbers
Cut-off Length = Length Required for Sample
| Ra (micrometers) | Ra (microinches) | RMS (microinches) | CLA (N) | Rt (microns) | N | Cut-off Length (inches) |
| 0.025 | 1 | 1.1 | 1 | 0.3 | 1 | 0.003 |
| 0.05 | 2 | 2.2 | 2 | 0.5 | 2 | 0.01 |
| 0.1 | 4 | 4.4 | 4 | 0.8 | 3 | 0.01 |
| 0.2 | 8 | 8.8 | 8 | 1.2 | 4 | 0.01 |
| 0.4 | 16 | 17.6 | 16 | 2.0 | 5 | 0.01 |
| 0.8 | 32 | 32.5 | 32 | 4.0 | 6 | 0.03 |
| 1.6 | 63 | 64.3 | 63 | 8.0 | 7 | 0.03 |
| 3.2 | 125 | 137.5 | 125 | 13 | 8 | 0.1 |
| 6.3 | 250 | 275 | 250 | 25 | 9 | 0.1 |
| 12.5 | 500 | 550 | 500 | 50 | 10 | 0.1 |
| 25.0 | 1000 | 1100 | 1000 | 100 | 11 | 0.3 |
| 50.0 | 2000 | 2200 | 2000 | 200 | 12 | 0.3 |
Surface Roughness Chart Cheat Sheet
This surface finish ‘cheat sheet’ is a super handy tool to help you better understand the various surface finishes available.
| Micrometers Rating | Microinches Rating | Applications |
| 25 | 1000 | Rough, low-grade surfaces that result from saw cutting or rough forging. Therefore, such surfaces are suitable for certain unmachined clearance areas. |
| 12.5 | 500 | These are rough, low-grade surfaces resulting from coarse feeds and heavy cuts. While the cuts come from turning, milling, disc grinding, and more. |
| 6.3 | 250 | This type of surface finish results from surface grinds, disc grinds, milling, drilling, and more. Therefore, they are for clearance surfaces with stress requirements and design permits |
| 3.2 | 125 | The roughest kind of surface is often recommended for parts. It is also used for parts subject to vibrations, loads, and high stress. |
| 1.6 | 63 | Good machine roughness/finish with its production under controlled conditions. It also involves fine feeds and relatively high speeds. |
| 0.8 | 32 | A high-grade machine finish, which needs close control. It is relatively easy to produce with cylindrical, centerless, or surface grinders. It is also preferred for products that do not require continuous motion or large loads. |
| 0.4 | 16 | High-quality surface are often produced using emery buffing, lapping, or coarse honing. These finishes are therefore great options where smoothness is of high importance. |
| 0.2 | 8 | Fine, high-quality surface finish produced by lapping, buffing, or honing. Machinists use this where rings and packings have to slide across the surface grain. |
| 0.1 | 4 | A refined surface that is offered using lapping, buffing, or honing. Manufacturers use it only when there are mandatory design requirements. Therefore, it is the best finish in gauge and instrument works. |
| 0.05 0.025 | 2 1 | Most refined surface finish produced with the finest buffing, honing, or superfinishing. Thus, they are best used for fine and sensitive precision gauge blocks. |
Conclusion
Since getting precise surface roughness could be costly and challenging in today’s manufacturing, surface finishing operations require the best methodology to generate desired finishes on fabricated parts.
Surface finish stems from the understanding of the surface hardening rate of a given material. No worry. RapidDirect is your best choice for quality surface finishing services at the best prices. Our team of experts understands the proper methods involved in exacting surface finish standards.
ZheJiang Dongrun Casting Industry Co,.Ltd was built in 1995, We have been in the casting industry for more than 25 years. No matter what type of molding you need done, we are the right supplier for your jobs. Unlike other of our competition, we offer four types of castings.
Dongrun Casting have 20000 square meters facility houses and 200 production & test equipment, From quotation and tooling design to casting and finished machining, we can work with you at every stage. We serves wide range of industries-from Fortune 500 corporations to small and midsize OEMs. Our products includes:
❖ HVAC | ❖ Architectural parts |
Browse our online showroom to see what we can do for you. And then E-mail:dongrun@dongruncasting.com us your specifications or inquiries today
